Firstly, what I did was search for pictures on Google Images of swimmers
or sportspeople that were posing in such a position that I could use them as a
front cover model for the headphones on my magazine, and so that I could build
the product around them. These were a few pictures I considered:
I chose this one, seeing as it was a close-up image of the swimmer’s
head, allowing me to model the headphones in detail and slightly bigger than
they could’ve fit on another one of the swimmers in other pictures. Also, the
angle that the headphones would fit on her head would allow me to display
majority of its features on the side with the most prominent functions of the
headphones. In addition to this, seeing as the product is aimed mainly for
synchronised swimmers who are typically female, having a female model would
help attract the target audience’s attention
Next, I found a few different types of headphones that I could use as a
template to build the advanced features of my design on. Here are a few of the
options I looked at:


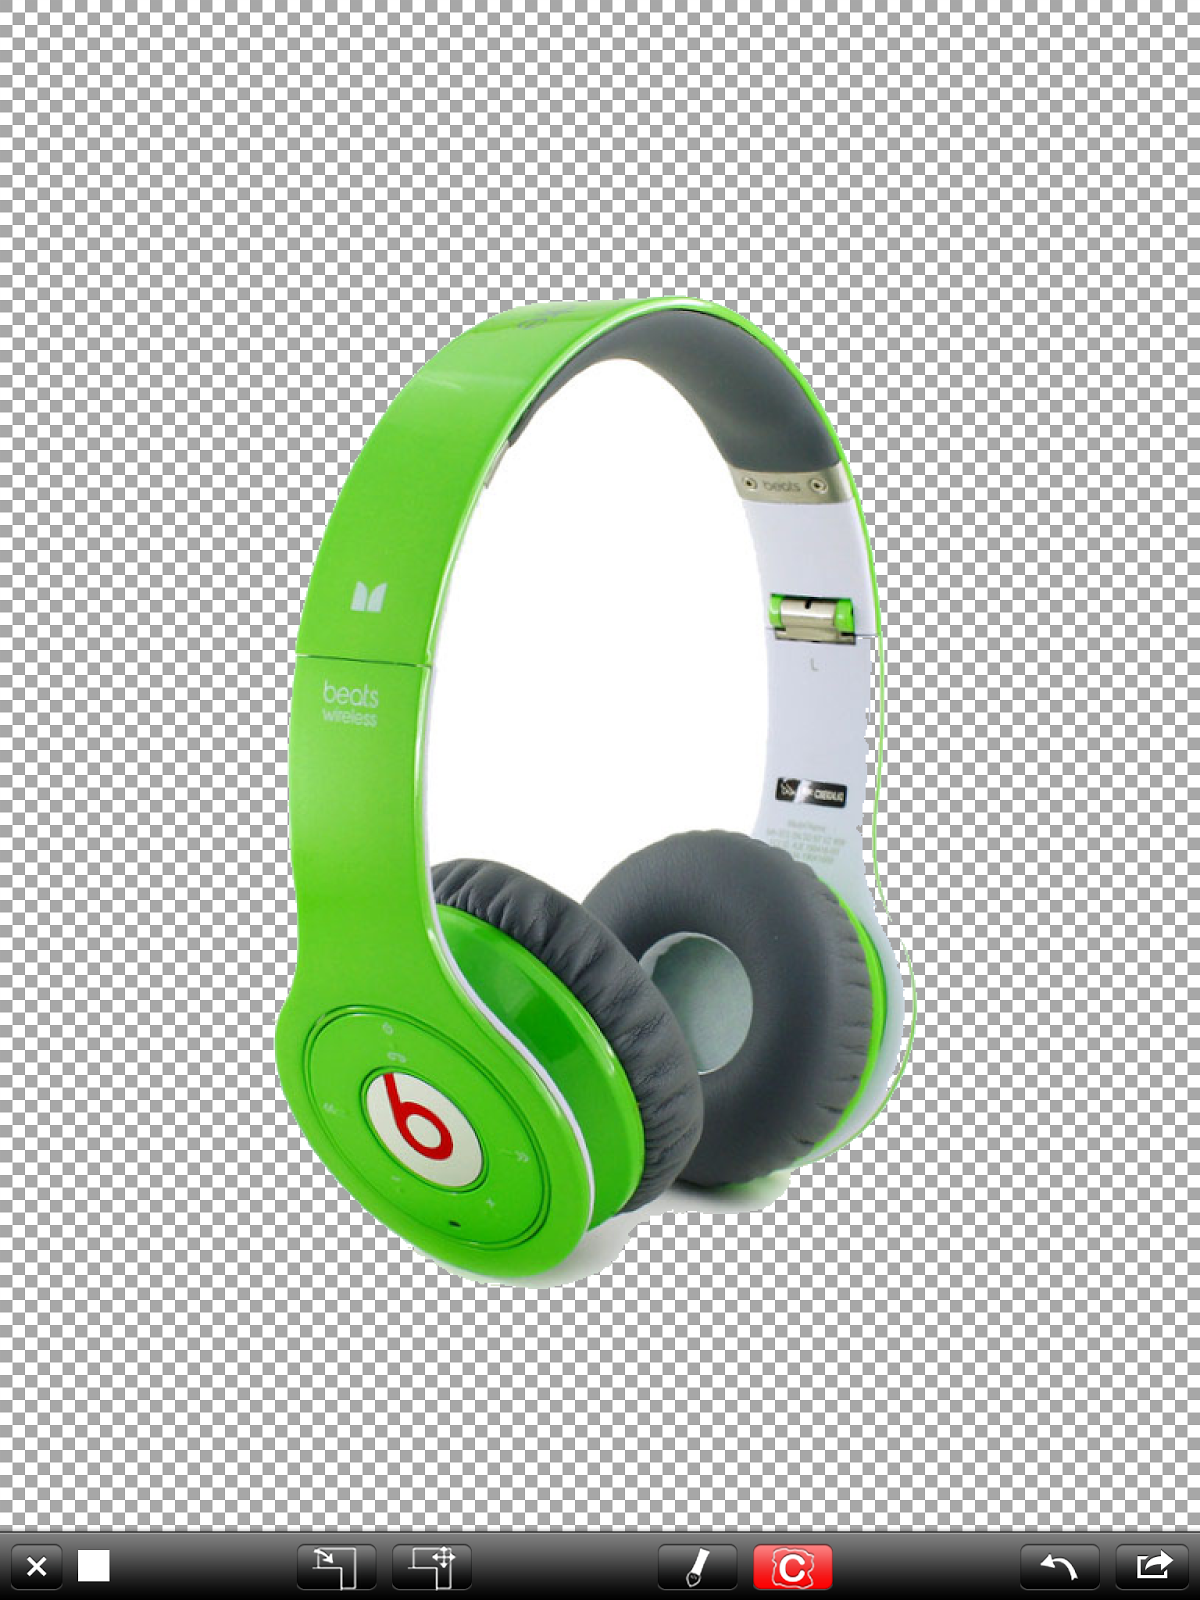
I experimented with a few of the headphones on the model, and finally chose the lime one, because it looks very realistic and the green suits the cool-coloured theme of the
background picture. I superimposed the images of the headphones onto the model
using the app ‘P-Blender Lite’. It allows you to import photos, remove
background using two different tools (one a colour remover, and the other an
erasing marker that you can adjust the span of and guide using your own fingers
to erase the specific parts of an image that you wish to remove), rotate the
image, and then import another photo of your choice behind the foreground photo
and adjust position of. I inserted the pair of headphones I wanted ‘on top’ of
the model’s head by in fact removing its background and then inserting the
model behind it. I then spent a
little time readjusting the photo behind the headphones and clearly
remove-backgrounding the edges to make it look a little more professional.


Then, I used an app on my iPad named ‘Frames Delight’. It is a photo-editing
app that allows you to adjust features of a photo such as brightness, colour
contrast, saturation, warmth and etc. I utilised it to adjust the photo so that
the edges of where I ‘photoshopped’ in the headphones onto the picture blended
naturally and the picture didn’t look fake but instead realistic, as if the
image were taken with the swimmer actually wearing the headphones.
Readjusting the photo required for me to increase its warmth, meaning
that although the editing is well disguised, the photo colour quality is poor
as that made it a bit yellow. I imported this photo into an app called ‘PicArt’,
in which I added a mild filter to the picture to bring out its cooler-based
colour scheme.
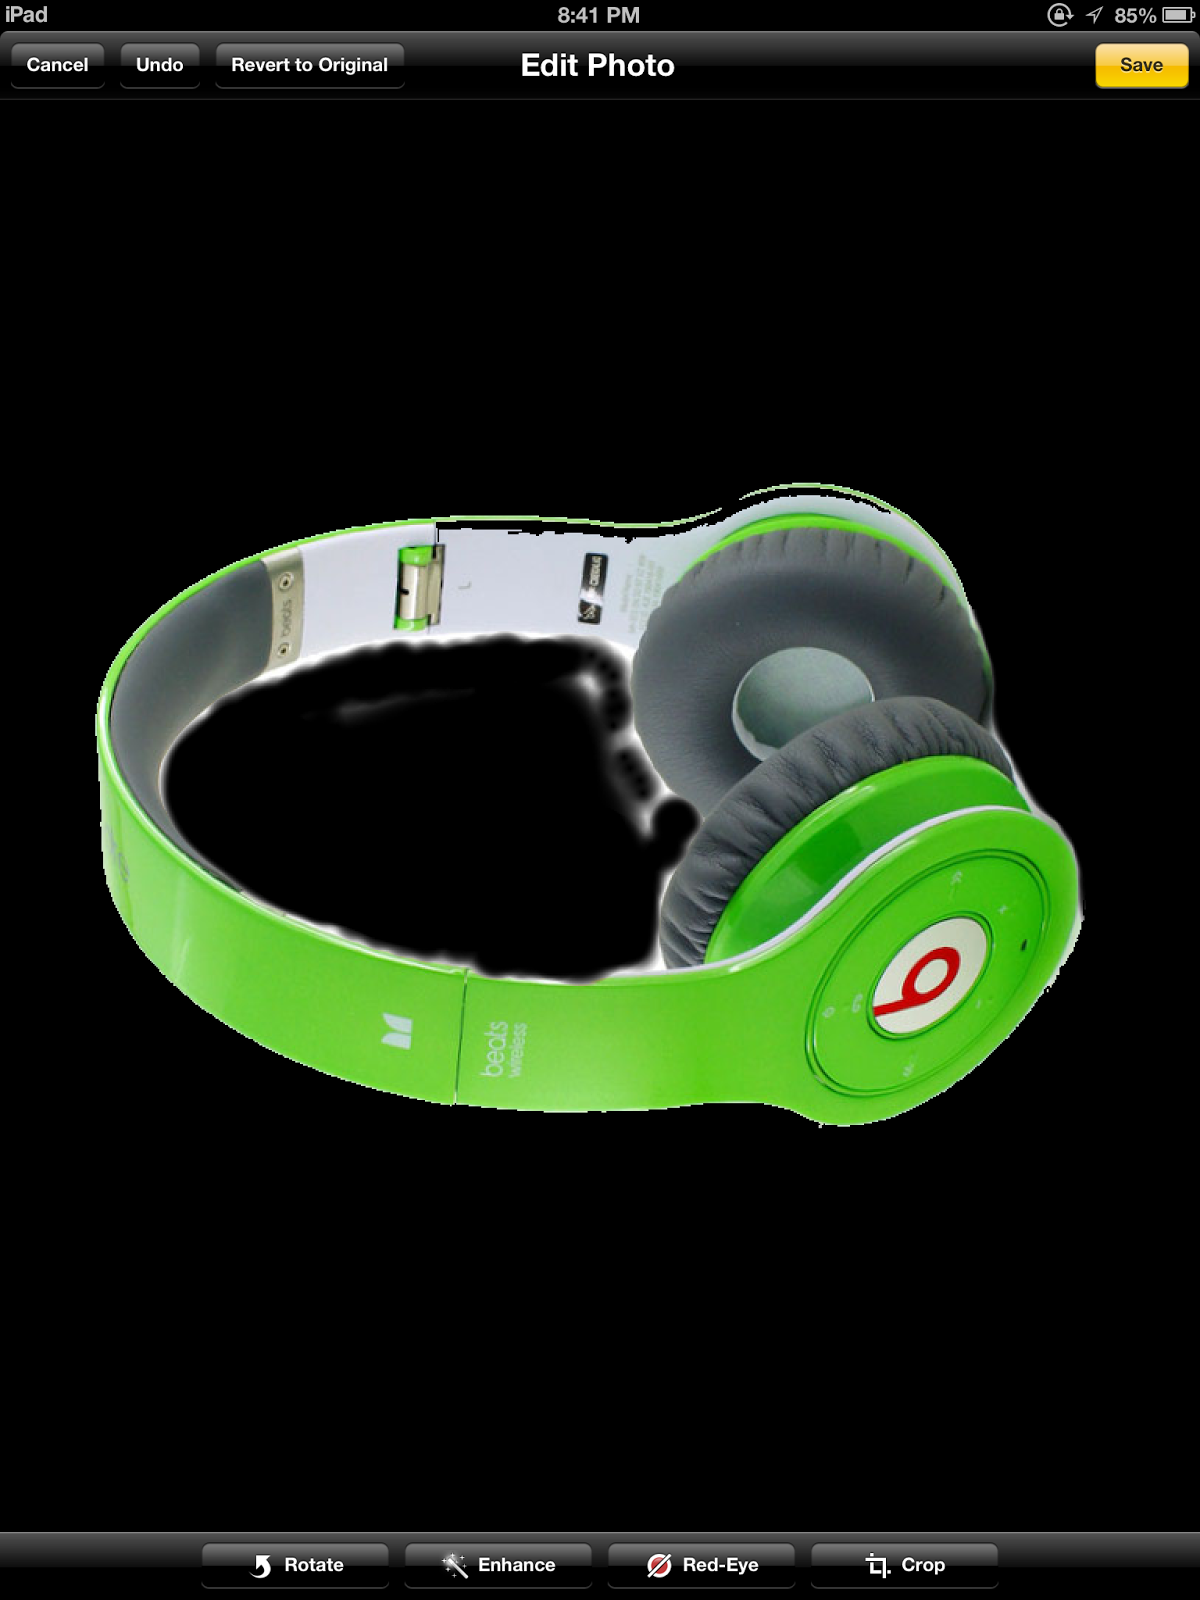
Next, I imported the photo back into ‘P-Blender Lite’ and used the
marker tool in a medium size to remove the center bit of the earmuffs on the
headphones that held the Beats logo –
now this leaves me space to build the screen of my product on the headphone
after imported it to my laptop.
Before continuing on to work on my laptop to finish creating the
product, I did one more thing. I needed to find an image for the screen of my
headphones – their design was fairly similar to that of an iPhone screen,
except they had a voluem icon where the home button is. So, using an iPhone
image that I found on Google Images, I imported it into ‘P-Blender Lite’ and
then used the large size marker tool in order to remove the area where the home
button was and then inserted a volume icon behind it, adjusting it so that it
fit into the image perfectly, while at the same time blending in well due to
the faded, soft edges that the marker tool offered.


After importing both these images onto my laptop and into Microsoft
Word, I positioned the edited iPhone image on top of the headphones where it’s
supposed to be, then rearranged the pictures so that the iPhone was behind the
headphones, showing through the transparent part that I removed, and so that
the pictures were layered on top of one another perfectly.
Finally, to finish off the product, I downloaded four images of the
icons that wee to be displayed on the app screen along with the ‘song option’
icons such as pause, play, stop, fast-forward and rewind played around with
them for a bit, rotating and resizing them so that they all fit on the screen,
and then finally grouping all of the pictures together to create one larger
picture of the product as a whole.


